Wednesday, January 6, 2016

Salsa Verde

 
Happy New Year everyone! How are you feeling about 2016? Tired and not ready to go back to work, or pumped and positive about what what the new year may bring? As for me, I am really excited about the big things that are happening this year. Oscar is going into grade 2, Charlie is starting prep and Noah is off to daycare for the first time. That will leave me with 3 child-free days (feeling a little sad about that) to really get stuck into some hair and beauty stuff that I have thing about for some time now (feeling great about that!). I've found a really good website to help me with all that.

In order to make it all run smoothly I will need to be really organised with food and shopping and I'm working on some planning tools to help with that. My health will also have to be a priority this year if I am going to have the energy to do everything I want and need to do.

While I don't set resolutions as such I do set intentions, and as always I intend to eat more vegetables, to really get a rainbow of colours on my plate every day. We tend to get stuck in a veggie rut and let's face it, the same old steamed vegetables served on the side of whatever protein we happen to be having that night can get boring.

For me the secret to eating and really enjoying salads and vegetables is a great sauce. If you can whip up a great homemade mayonnaise and a handful of different salad dressings you can make anything taste amazing.

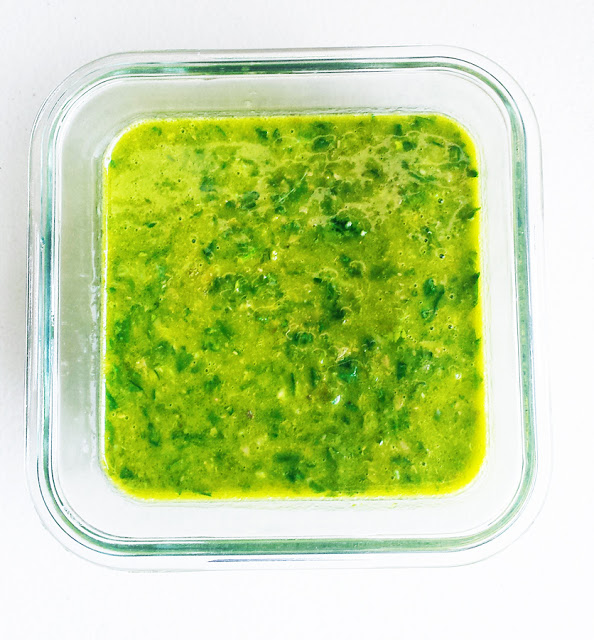
Salsa verde literally means 'green sauce' and is a packed with the good stuff like fresh herbs, garlic and extra virgin olive oil. It is fantastic tossed through salad leaves and it makes a plate of steamed greens really sing. It is so good that I can (and do) eat spoonfuls of it straight from the bowl.


Salsa Verde
Slightly adapted from Taste

1/2 bunch flat leaf parsley
1/2 bunch basil
1 garlic clove, crushed
2 ts capers
zest of 1 lemon
3 tbs fresh lemon juice
1/2 cup extra virgin oil
salt and pepper to taste

Place the herbs, garlic, capers and lemon zest into the food processor and blitz until finely chopped (TMX 10 secs / SP 8, scraping down the bowl halfway).

Add the lemon juice and then with the motor running drizzle in the oil and process for about 30 seconds. Transfer to a glass bowl and store covered in the fridge for up to 3 days (if it lasts that long!)

This one is husband-approved so give it a go!


Wednesday, December 30, 2015

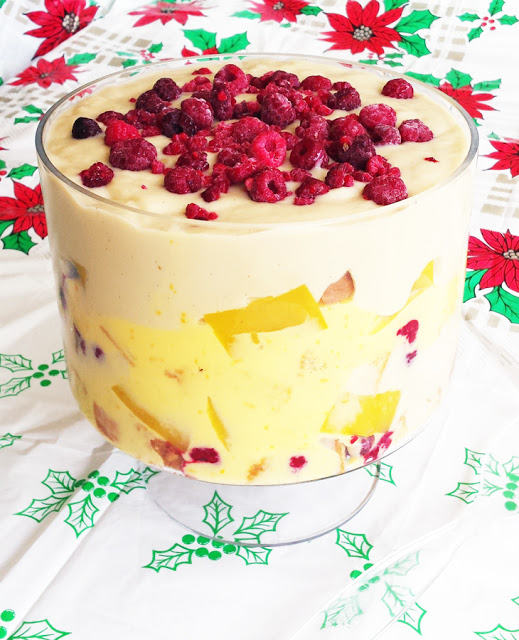
My Summer Fruit Trifle (Thermomix)


For me trifle is the quintessential Summer, and therefore Christmas, dessert. It was my favourite thing growing up and I remember the excitement of helping mum assemble it with bought jam roll, red and green jelly, tinned peaches and lashings of bright yellow custard. There was nothing better on Christmas Day (although plum pudding with custard did come a close second and there is a story often told of me as a very young child asking for "a big piece please.")

Keeping with our no-roast Christmas lunch this year it went without saying that we would have trifle for dessert. I made a Maggie Beer raspberry and lemon curd one last year and although we enjoyed it I felt it was a bit too tart overall. This year I played around with flavours and came up with this Summer Fruit Trifle which we all LOVED. I will probably still make a few tweaks for next year (I can never leave a recipe alone) but this was pretty close to perfect.

I was too full to have any at lunchtime but I had a small taste at dinner and then a bowlful for breakfast on Boxing Day. Nothing wrong with that!

This is my final post for 2015 and what a year it's been! Looking forward to spending 2016 with you all.  Enjoy x

My Summer Fruit Trifle

Spelt Genoise Sponge 
Recipe from Jude Blereau's Wholefood for Children, Thermomix adaptation by me

130g white spelt flour, sifted
4 large eggs, at room temperature
100g golden caster sugar (made from raw sugar blitzed in the TMX 10 secs / SP 9)
1 ts vanilla extract
40g melted butter

Preheat the oven to 180 degrees C / 160 degrees fan-forced. Grease and line the base and sides of an 8 inch cake pan and set aside.

Using the butterfly, whisk together the eggs and the sugar for 10 minutes / SP 4 until thick and pale.

Add the vanilla and beat again for a few seconds.

Remove the butterfly, add the flour and beat for 10 secs / SP 3.

Add the melted and cooled butter and beat again for another 10 secs / SP 3.

Use a spatula to scrape around the edges and fold through any remaining butter or flour.

Pour the mixture into the prepared tin and bake for 20-22 minutes. It will be golden brown, springy in the middle and pulling away from the sides.

Leave to cool completely in the tin. When ready to assemble the trifle, cut the cake into cubes.

Mango Jelly
2 large mangoes, seed and skin removed
2 cups coconut water
2 tbs gelatine (I use Great Lakes brand)

Place the mango flesh into the mixing bowl along with the coconut water and blend for 20 secs / SP 9.

Sprinkle over the gelatine and cook for 3 mins / 60 deg / SP 4.

Pour into a lightly oiled slice pan and place in the fridge. Cut into small cubes when ready to assemble the trifle.

Custard
1L rice milk
4 eggs
140g rice malt syrup
2 tsp vanilla extract
1 heaped tbs arrowroot

Place all ingredients into the mixing bowl and cook for 10 mins / 80 deg / SP 4.5. Pour into a heatproof jug. Cool on the bench for 30 minutes before placing into the fridge to chill completely.

Lemon and Orange Curd
Adapted from Tenina

200g rice malt syrup
zest of 2 oranges and 2 lemons
1/2 cup fresh orange juice
1/2 cup fresh lemon juice
240g cold unsalted butter, cut in cubes
2 heaped ts arrowroot 
4 whole eggs
2 egg yolks

Place butter into the mixing bowl and chop 5 secs / SP 5.

Add all remaining ingredients and cook for 10 minutes / 80 degrees / SP 5.

Cook for a further 3 minutes / 90 degrees / SP 6.

Pour into a large glass container. Place in the fridge once cooled.

Assembling the trifle

2 cups raspberries
2 cups sweet, ripe pineapple, cut into small thin slices

To assemble the trifle (best done at least a few hours ahead of time), place alternating layers of cake, fruit, curd, jelly and custard into a large trifle dish, finishing with a layer of custard and a scattering of raspberries over the top. Keep in the fridge until ready to serve. 

Serves 8-10


Monday, December 28, 2015

My pre-Christmas Bake-a-thon and the Best Ever Gingerbread

 
Merry Christmas everyone! Hope you all had a fabulous day. We enjoyed a lovely relaxing Christmas at home which was perfect as there is no way the boys would have wanted to leave their brand new trampoline behind.

Did anyone else have a Christmas Eve bake-a-thon? I spent most of the day in the kitchen and then crashed in the afternoon before heading out for the evening. Don't get me wrong I really enjoy the baking and cooking (I wouldn't be here otherwise!) it's just the cleanup that gets me down. I am so grateful to have a dishwasher, we couldn't get by without it.

I was trying not to leave everything to the last minute but some things can really only be made the day before, and other things I sort of forgot about so ended up doing those too!

I know you are probably all totally over Christmas food but I wanted to post at least this one recipe so I can keep track and make it again next year (and probably before that too) because it was totally amazing.  

I didn't have much cooking to do this year but I did lots of sweet things.

On Christmas Eve I made 2 types of custard to take to my mother in laws house (the pudding was already prepped thank goodness). Then for our trifle I made a lemon and orange curd, a spelt genoise sponge, more custard and a mango and coconut jelly. Yum! I also made a double batch of this pumpkin gingerbread for our Christmas breakfast, a batch of my dairy-free rum balls and a batch of gingerbread men so the boys would have something yummy to leave for Santa. Whew!!

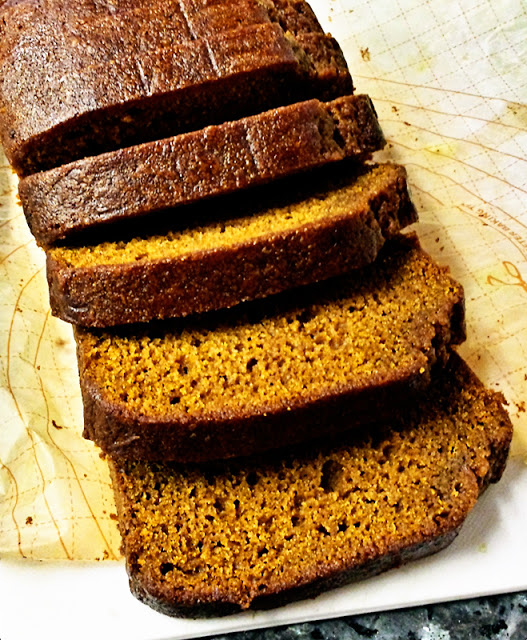
For me this gingerbread was the absolute highlight of my Christmas baking. It was everything you want in a gingerbread - packed with warm spicy flavour, incredibly moist and tasted even better the next day when you can't be bothered cooking anything. We had it Christmas morning with some homemade peach and chia jam.

While I think it would be more suited for our Christmas in July celebrations rather than a hot summertime Christmas, I would happily eat this any day and am glad to have half a loaf still stashed in the freezer.

Apologies for the less than stellar photo - cake for breakfast waits for no man! Had to snap one quickly and then get it on plates for the hungry horde. 
 

Best Ever Pumpkin Gingerbread 
Adapted from Simply Recipes

400g white spelt flour
1 1/2 ts bicarb soda
1 tbs ginger
1 tbs cinnamon
1/2 ts nutmeg
1 1/2 ts salt
2 cups pumpkin puree
225g melted butter
2/3 cup coconut sugar
1/2 cup rice malt syrup
1/2 cup molasses
4 eggs, beaten
1/3 cup water

Preheat oven to 180 degrees C / 160 degrees C fan forced. Grease and line 2 loaf pans (mine were pyrex) and set aside.

In a large bowl whisk together the flour, bicarb, salt and spices.

In a separate large bowl or jug, whisk together the remaining ingredients until smooth.

Pour the wet ingredients into the dry ingredients and fold through until just combined.

Pour the mixture evenly into the prepared pans and bake for 45-60 minutes (mine was done at 45 minutes so start checking then). It is done when a skewer inserted into the middle comes out clean.

Leave in the pan for 5 minutes before turning out onto a wire rack.

Delicious served warm with butter but it's even more amazing the next day if you can wait that long.


Sunday, December 20, 2015

Christmas Menu 2015

 
Image source

I'm a little later with my Christmas menu planning than I was intending but I've still made it with 4 days to spare!

We spent most of the day today celebrating an early Christmas with my dad's side of the family. As usual the food was spectacular - ham off the bone, maple glazed chicken, quiche and 8 different salads including my Rice Salad, and followed by cheesecake, a chocolate and raspberry ice cream pudding and a very boozy trifle. The kids were spoilt rotten and we also came home loaded with homemade Christmas cake, chutneys, shortbread and rum balls. Whew!

Yet again for the big day though we are going for low-stress and fuss-free so our menu is quite pared back. No roast turkey again this year just lots of seafood, salads and fruit. We are planning on doing a roast pork belly for Boxing Day.

We are going to my mother in law's house for Christmas Eve and then hosting at home for Christmas Day. I'm very excited to have our first Christmas in our new home, plus the boys have a BIG present coming to the backyard on Christmas Eve!!!. And that reminds me, one of my friends has just given birth to a new baby boy. I am thing of buy them something practical for present. Maybe a baby stroller or pram will do the trick. I will search online for a good but reasonably priced stroller when I have time.

Christmas Eve

Nibbles
Cheese, crackers, nuts and truffles

Main
Barbecued chicken and witlof salad
Grilled prawn, chorizo and corn couscous salad
Sweet potato salad
Ham
Sourdough rolls

Dessert
Steamed orange pudding
Dairy-free Custard

Christmas Day

Breakfast
Gingerbread Loaf
Mango smoothies

Nibbles
Pate, crackers and nuts

Main
Seafood platter with tiger prawns, smoked salmon and condiments
Barbecued side of salmon
Ham
Crunchy duck fat roast potatoes
Avocado, mango and walnut salad
Coleslaw

Dessert
Dairy-free Mango and raspberry trifle


I still have a few more festive recipes to post over the coming days but now that the official Christmas menu is set I feel ready to go. I'm doing our final Christmas shopping kid-free first thing in the morning and then it should be smooth sailing!

How is your planning going? Any family favourites that you just couldn't have Christmas without?


Sunday, December 13, 2015

My Fruit Mince Tarts


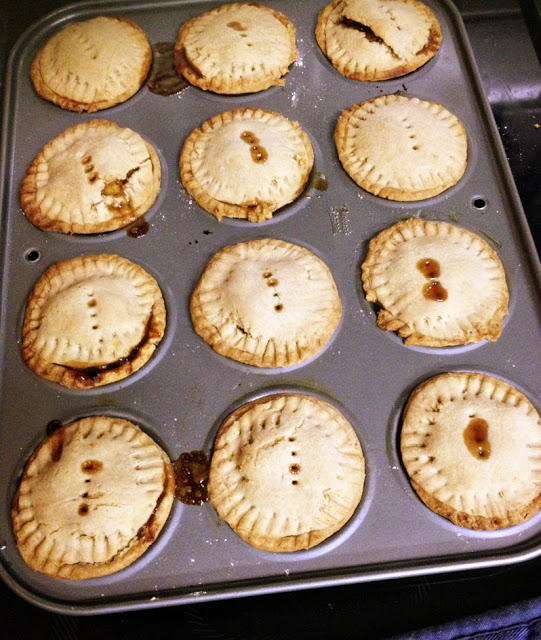
The first day of the school holidays was unexpectedly cool and rainy so what better way to spend it than to with some Christmas baking! My husband has been dropping not so subtle hints for fruit mince tarts over the past few weeks so that was first on my list.

Before I got into my wholefoods groove I used to make fruit mince tarts with packet pastry and a jar of pre-made fruit mince. Not any more. I love making pastry and after a few years of practice I feel like I understand it a little more and can prevent some disasters. And honestly how amazing is homemade pastry?  If you don't feel up to making your own, the Careme brand pastry in Australia is really good and they even have a gluten free version.

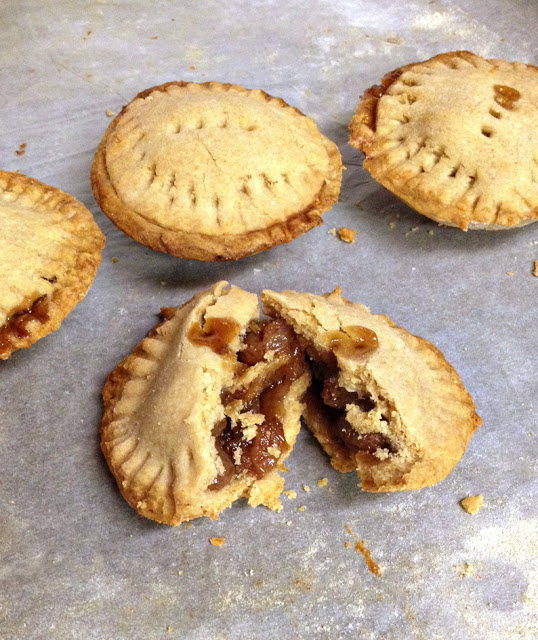
I used my go-to spelt pastry recipe and developed my own fruit mince recipe which was SO delicious I couldn't help taking lots of sneaky spoonfuls for 'just to check if it was ready.' Ha!
 

The kids were hanging around by the oven waiting for them to bake because they smelt so amazing and then each had 3 for afternoon tea. So that's a big tick of approval.

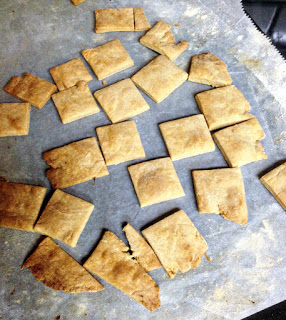
The pastry recipe makes enough for one batch of 12 tarts and I rolled the scraps out into some little biscuits which we snacked while waiting for the tarts to cool enough to eat.
 

The fruit mince recipe makes enough for 2 batches of 12 tarts and is stashed in the fridge to make some more next weekend. As I was making these for kids I cooked the brandy in with the fruit to get the flavour but cook off most of the alcohol. You can add the brandy at the end once the fruit is cooked for a bit more of a kick.


My Fruit Mince Tarts

Fruit mince:

500g organic mixed dried fruit
5 granny smith apples (peeled, cored and diced)
1 cup fresh orange juice, pulp and all
1/2 cup rice malt syrup
1/4 cup brandy
zest of 1 orange
1 ts cinnamon
1/4 ts nutmeg
1/4 ts clove
1/4 ts allspice

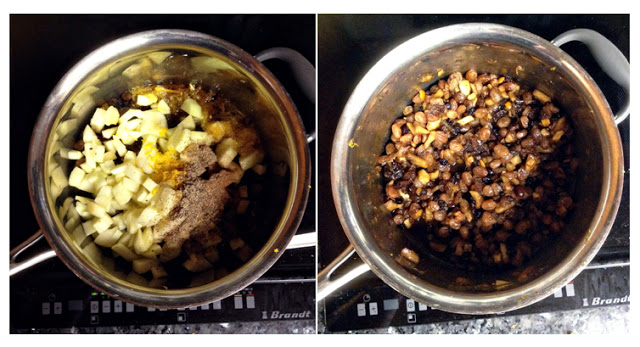
Place all ingredients into a pot over medium heat. Bring to the boil then reduce the heat and simmer until the apple has completely softened and the mixture is thick and sticky. This will take around 20 minutes or so. Remove from the heat and leave to cool completely.

Pastry:

250g white spelt flour
20g coconut sugar
125g cold salted butter
1 egg yolk
2-3 tbs iced water, as needed

Place flour and sugar into the thermomix or food processor and mix just to combine and break up any lumps. Add the butter and process for a few seconds at a time, until the mixture resembles rough sand. Add the egg yolk and 1 tbs iced water and process again for a few seconds at a time until the dough starts to clump together. Add extra water 1 tbs at a time only if needed.

Turn the dough out onto a piece of plastic wrap and press into a disc. Wrap well and place into the fridge to rest for at least 20 minutes before rolling.

To assemble the tarts:

Preheat the oven to 180 degrees C / 160 degrees fan-forced. Grease a 12 cup tart or muffin tray and set aside.

Roll out about 2/3 of the dough (leave the rest in the fridge) about 3mm thick. Using a round cutter (mine was 7cm), cut out 12 circles for the bases of your tarts. Choose a cutter that is just a little wider than the diameter of each hole in your tray and they will fit perfectly. Press each circle over the base of your prepared tray and set the scraps of dough aside.

Place a teaspooful of fruit mince mixture into each tart base, being careful not to overfil or the edges won't seal. Using your finger, dab some water around the edge of pastry of each tart.

Roll out the remainder of the dough from the fridge in the same way, but use a slightly smaller cutter (mine was 6cm) to cut 12 circles for the tops of your tarts. Place a piece on top of each tart and then use a fork to crimp and seal the edges. Use the fork to pierce the top of each tart to allow steam to escape.

Bake for 15-20 minutes until the tarts are golden brown and smell amazing. Cool in the tray for 5 minutes before turning out onto a rack. Delicious warm or cold.

Buttery pastry surrounding sweet and spicy fruit, there's a reason these are a classic!


Thursday, December 10, 2015

Bacon, Spinach and Garlic Pull-apart Bread


Aaaand so it's December! Things have been very quiet around here lately as I attempt to overhaul my blog. After lots of messing around I have ended up with 2 sites that aren't linked up and there's a whole lot of work to get things ready to go. I will keep you posted but I hope to launch in the New Year.

I haven't been doing much cooking of note lately. I've been sick for the past 3 weeks with a throat and chest infection so quite apart from not having enough energy to cook, I also haven't felt like eating. Tragic I know!

But even I can't resist the aroma of freshly baked bread. We've massively cut back on the amount of bread we buy so I've been baking more. Usually just sandwich loaves (recipe to come!) or a quick focaccia but sometimes you just want something a little fancy.

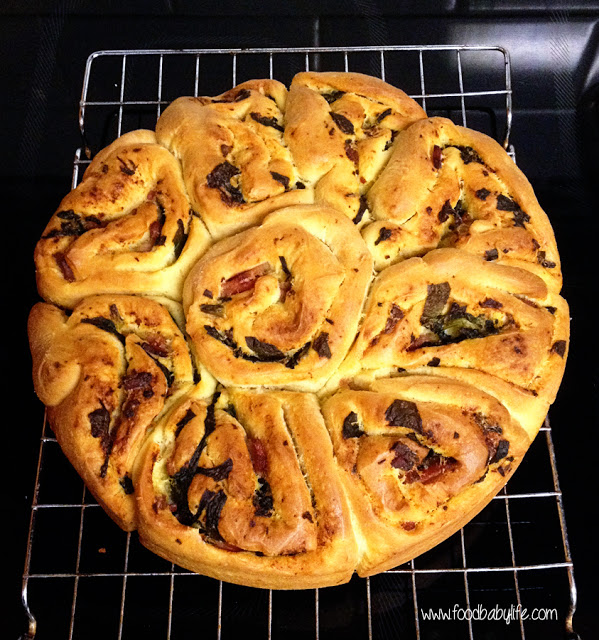
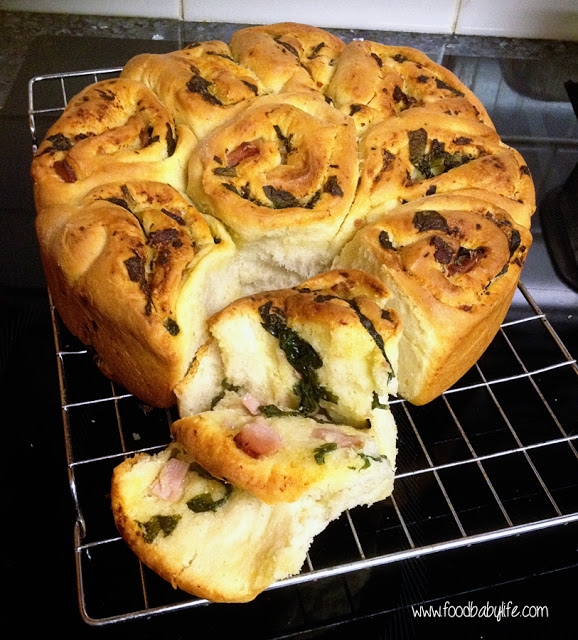
This bacon, spinach and garlic pull-apart was amazing. AMAZING. These sorts of bread are normally dripping with butter and cheese but I needed a dairy-free version and this worked perfectly. It is so packed with flavour from the bacon, garlic and olive oil that you don't miss the cheese, or in fact even notice that you were expecting some.

I made the dough and filling in the thermomix but you absolutely don't need to. Making the dough by hand (or breadmaker or however you normally make dough) and the filling on the stovetop will work just fine, it may just take a bit longer.


Bacon, Spinach and Garlic Pull-apart Bread

Dough:
450g water, room temperature
1 tbs instant dried yeast
1 ts salt
750g baker's flour
100g extra virgin olive oil

Filling:
50g extra virgin olive oil
4 rashers bacon, roughly chopped
1 big handful baby spinach or 2 large leaves silverbeet, finely chopped
3 cloves garlic, crushed

Grease a 9 inch cake pan and set aside.

TMX instructions to make the dough - place the water and yeast in the mixing bowl and heat for 2 minutes / 37 degrees / SP 2. Add the salt, flour and oil and mix for 6 seconds / SP 6, then knead for 2 minutes / interval setting.

Remove the dough, shape into a bowl and leave to prove in a covered and greased bowl for around 30 minutes, or until doubled in size.

Meanwhile make the filling - in the thermomix add the garlic and chop for 2 seconds / SP 7. Scrape down the bowl, add the bacon and chop for 3 seconds / SP 6. Scrape down the bowl, add the oil and cook for 3 minutes / varoma / SP 2. Add the spinach and cook for 2 minutes / 100 degrees / SP 2. (To prepare filling on the stovetop just chop all ingredients and fry together in the oil for 5 minutes or so until softened and fragrant). Tip the mixture into a heat proof bowl and leave to cool until required.

Preheat the oven to 180 degrees C / 350 degrees F.

To prepare the bread - knock down the dough and tip it out onto a floured surface. Roll out into a large even rectangle, about 1cm thick. Spread over the cooled filling evenly to the edges.

Using a sharp knife, slice the dough into 4cm wide strips. Fold each piece into a concertina and place into the prepared tin, cut side up. Repeat with remaining dough until the tin is full. Leave to prove for another 15 minutes.

Bake for approximately 45 minutes. It will be risen, golden brown and smelling delicious. Leave in the tin for a few minutes before turning out onto a wire rack.

It's ready to eat as soon as it is cool enough to handle.
 

Monday, November 23, 2015

Cardamom Pear Muffins (SRC)


It's Secret Recipe Club time again! Each month a dedicated group of bloggers are assigned a blog in secret to peruse and cook from, and then we all post on the same day. Today is reveal day for group D.

This month I was assigned Nicole's blog Hapatite and wow was I in for a treat. Hapatite ("hapa" meaning half or of mixed racial heritage and "tite" meaning appetite) is an absolute treasure-trove of amazing recipes, all drawing upon her family's Chinese, Cherokee, German and Hawaiian American background. As you can imagine this makes for some fabulous food!

One dish that really caught my eye was Nicole's take on char siu chow fun which is served for Chinese New Year.  But then I also loved her Baked Onion Rings and homemade Filet-o-Fish which was my go-to late night meal back in my uni days!

Nicole is also something of a tea connoisseur and has reviewed some really interesting tea blends. My favourite was the Candied Chestnut Tea and I wish it was available here! I really love tea and have an ever-growing collection of herbal teas so this made for some great reading.

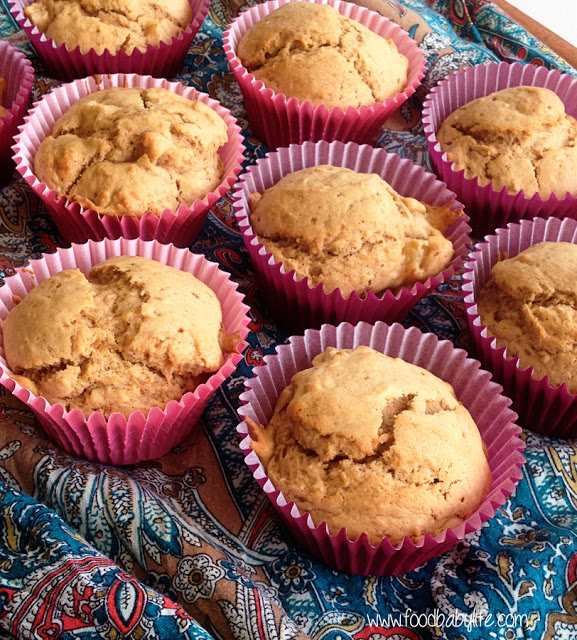
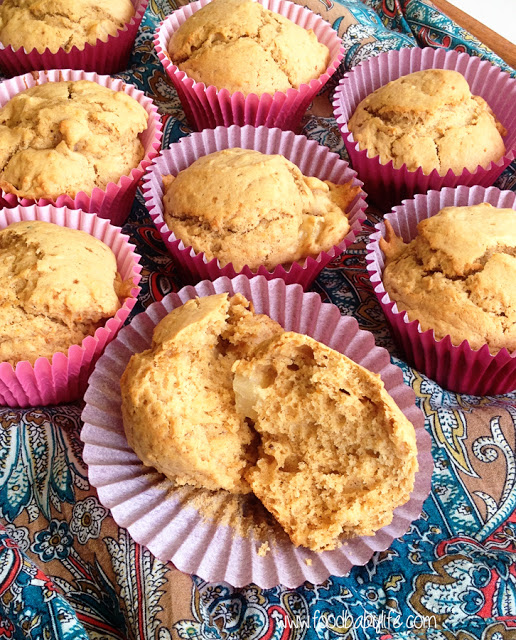
As usual though I was on the hunt for kid-friendly snack ideas and you can't beat a muffin. Enter these Cardamom Spiced Pear Muffins.

Cardamom is one of those spices that seems to get overlooked. I remember making a cardamom cake years ago that I absolutely loved but I haven't really used it since, apart from in curries.

These muffins were absolutely delicious. The cardamom added a complexity of flavour that I wasn't expecting yet it wasn't overpowering, probably because it was paired with cinnamon and nutmeg (and the clove that I added because I love it). My boys loved these and as usual I wished I'd made a double batch because they disappeared way too quickly.
 

Cardamom Pear Muffins
Slightly adapted from Hapatite

2 cups self raising flour (or 2 cups plain flour + 1 tbs baking powder)
1/2 cup coconut sugar
85g softened butter
2 large eggs
1 ts vanilla extract
1 ts ground cardamom
1 ts cinnamon
1/2 ts nutmeg
1/4 ts ground cloves
1/2 cup buttermilk (I used 1/2 cup rice milk soured with 1 ts apple cider vinegar)
1 large pear, just ripe, cut into small dice

Line a 12 cup muffin tray with paper liners. Preheat the oven to 170 degrees Celsius fan-forced.

Cream together the butter and sugar until light and fluffy. Add the vanilla and the eggs, one at a time, beating well between each addition. Add the spices and mix well.

Fold through 1/2 the flour followed by 1/2 the buttermilk, then repeat with the remainder.

Fold through the pear pieces.

Spoon the mixture into the prepared tray and bake for 15-18 minutes or until golden brown and a skewer comes out clean.

Cool in the tin for 5 minutes before turning out onto a wire rack to cool completely (or just eat warm as they are amazing straight from the oven!!).

Thanks for a great month and a delicious recipe Nicole!