Saturday, January 26, 2013
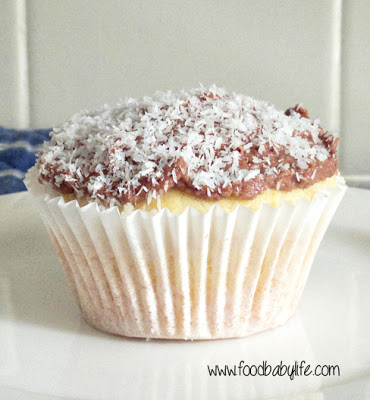
Lamington Cupcakes for Australia Day
Happy Australia Day! The rain has put an end to our normal Australia Day activities of bbqs and catching up with friends so we are instead we at home just hanging out, watching kids movies and of course, baking!
Last year I made real lamingtons with the kids but it was a bit fiddly for little fingers. This year I decided lamington cupcakes were the go. Much easier. We did most of this while Charlie was having his nap. We still ended up with 1 smashed plate and 3 smashed cupcakes but such is the joy of cooking with kids!
At almost 4 years old Oscar loves to help in the kitchen. He can pour in ingredients, stir and is even getting quite adept at cracking eggs! For these cupcakes he also placed the paper cases in the muffin tray, spread icing and sprinkled on coconut.
Some of my fondest memories of childhood are helping to cook and of course licking the spoon. I really hope to pass on such memories to my boys.
One of my goals for this year is to get both boys more involved with daily tasks. They both help a lot but don't really have any little jobs that are always just for them. I have already started getting them to help set the table with their own plates, bowls and cutlery. They have been their things in the sink almost since they could walk.
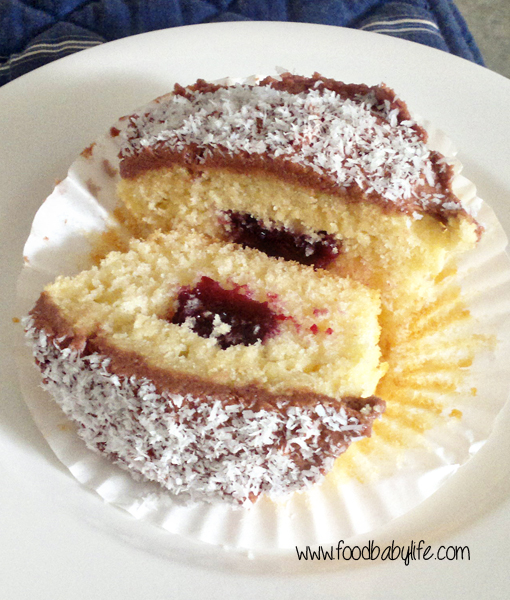
Anyway, back to the cupcakes. I won't bother posting a recipe here as it is a basic vanilla cupcake with chocolate icing, raspberry jam and dessicated coconut. A quick google search will give you a recipe.
These lamington cupcakes were absolutely delicious and the perfect sweet treat this Australia Day. Hope you're all having a good one!
Tuesday, January 22, 2013
BWJ - French Apple Tart
I'm not off to a great start with BWJ this year, seeing I completely forgot about the last one (seriously how did the 8th of January come around so quickly?!) and only just scraped in with this one!
I knew there was an apple tart coming up so I bought 2 bags of green apples assuming they would last. When I got ready to bake however, I realised there was just 1 lonely apple left and this recipe would require some major tweakage (that's totally a word).
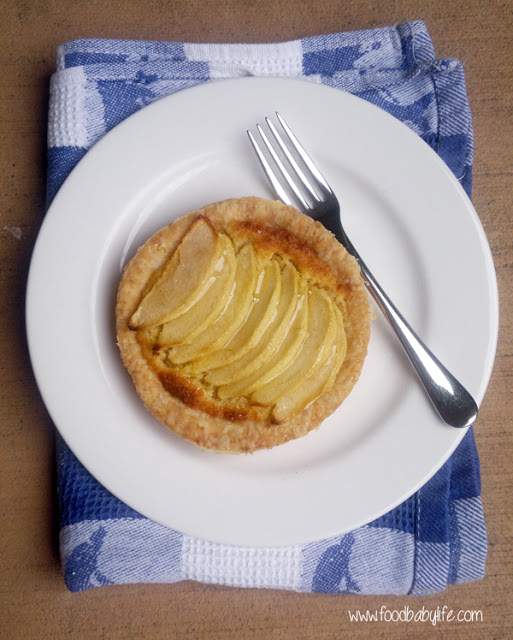
I think the beauty of this tart lies in the swirled apple slices on top so that's what I save my apple for. Rather than trying to sub another fruit for the filling, I went with a frangipane filling as I happened to have some almond meal. Apple and almonds are a great combination so I knew whatever happened this tart would at least be edible!
The taste test ...
Flaky buttery pastry topped with smooth almondy frangipane and fragrant apples. There really is no way this could be bad. I'm really keen to try the original version with the apple filling but this was a great substitute. Seeing as this tart bears little resemblance to the original I have included my recipe below.
My apologies to Gaye of Laws of the Kitchen for not making the actual tart. It's now on my to-bake list!
Mini Apple Frangipane Tarts
Makes 2 x 4 inch tarts
Pastry
1/2 cup plain flour
1/2 cup wholemeal flour
1 pinch salt
1 ts sugar
120g cold butter, diced
1-2 tbs cold water
Filling
25g almond meal
25g sugar
25g butter, at room temperature
1 egg yolk
1/2 ts vanilla extract
Topping
1 granny smith apple
1 tbs melted butter
1 tbs honey, warmed
To make the pastry - combine the dry ingredients in a bowl, add the butter and rub in with your fingertips, being sure to leave some pea-sized bits. If the butter starts to get too soft, place the bowl in the fridge for a few minutes. Once the butter is rubbed in add 1 tbs of the cold water and start to bring the dough together. If the mixture is too dry add extra water just a few drops at a time. Shape into a ball, wrap in plastic and leave in the fridge for 30 minutes.
Roll out the dough to approx 5mm thick and fit into 2 x 4 inch tart pans (there will be dough left over). Place the pans in the freezer for 20 minutes.
Preheat the oven to 180 degrees celsisus.
To make the filling mash the butter together with the sugar and almond meal then stir in the egg yolk and vanilla. Set aside.
Bake the tart shells for 20 minutes or until dry to the touch and very lightly golden brown. Remove from the oven and allow to cool for 15 minutes before spooning in the filling and smoothing the tops.
Slice the apple into thin wedges. Lay the slices across the top of each tart and brush with melted butter.
Reduce the oven temperature to 170 degrees and bake the tarts for approx 25 minutes or until the pastry and frangipane are golden brown and the apples are tender. Remove from the oven and brush with warmed honey.
Serve just warm.
Wednesday, January 16, 2013
New Year, New Name!
I can't believe after making such a major change I then promptly forgot to tell anyone! oops.
After much deliberation food.baby finally has it's own URL and a slight name change to foodbabylife.
Over the past few years I have started to feel constrained by the old name and wanted a new name to take the blog in a slightly different direction. It will still be predominantly a food blog but with more family and lifestyle posts tossed in to the mix.
The old blogger address does redirect to the new site but please subscribe using the new URL so you don't miss anything! Thank you :-)
Tuesday, January 15, 2013
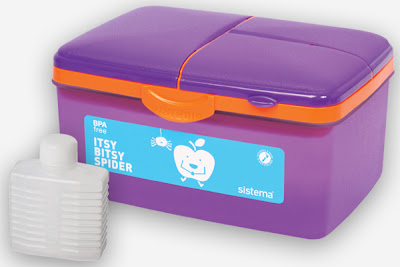
Sistema Quaddie Lunch Box Review
Well it's almost back to school time! I always loved this time of year when I was a kid. The holidays had dragged on long enough that I was looking for something to do and it was exciting getting new books, uniforms and stationery.
Oscar starts kindy at the end of this month (sniff) and I am just starting to get organised. Luckily he has a bag already, leftover from his daycare days, and doesn't need sheets etc now that he no longer has a daytime nap. What we really needed were labels to make sure all of his things come home and of coure, the all important lunch box.
My baby loves his food so finding something practical that he also really liked was important.
My requirements:
- BPA free
- easy for him to open and close
- big enough to hold both morning tea and lunch
- dishwasher safe
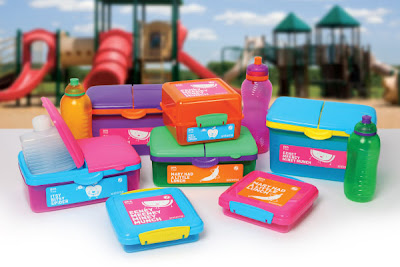
We are lucky that our kindy stores all lunchboxes in the fridge so we don't need an insulated lunch bag and special cold bricks. That narrowed our choices down to a few but the Sistema Quaddie (Itsy Bitsy Lunch range) in blue and yellow was a clear winner.
It has 3 compartments on top, one of which fits an included bottle which can be frozen to keep lunch cold. I plan on using the largest compartment for some sliced fruit, then separating out either cheese, crackers, carrot sticks or a homemade treat in the other 2.
Underneath there is plenty of space for a sandwich, muffin, tub of yoghurt or whole apple/orange. We saw lots of lunchboxes which had space for a sandwich but not much else. For the sake of variety I would like to be able to include a savoury muffin instead of a sandwich or include a proper tub of yoghurt rather than those small-but-full-of-sugar tubes of yoghurt with cartoon characters on them. Those things simply wouldn't fit or would be pretty squashed in some of the other lunchboxes.
We have had a few trial runs and Oscar found it easy to open all the individual lids and we have already made it a rule that it will be morning tea on the top and lunch in the bottom.
Not to be left out, Charlie has an identical quaddie lunchbox and I'm planning on packing his lunch up the same as Oscar's on kindy days. This should be a bit of a timesaver and also be special for Charlie who is going to miss his big brother terribly.
We bought our Sistema Quaddies at Kmart but they are pretty widely available. You can find stockists and more information here.
Note - this is not a sponsored post and no brand associations exist with Sistema or Kmart. I just wanted to share something that I like!
Monday, January 14, 2013
Meatless Monday - Potato Curry with Naan and Crunchy Fried Tofu
Happy New Year!! Hard to believe we are already 2 weeks into 2013.
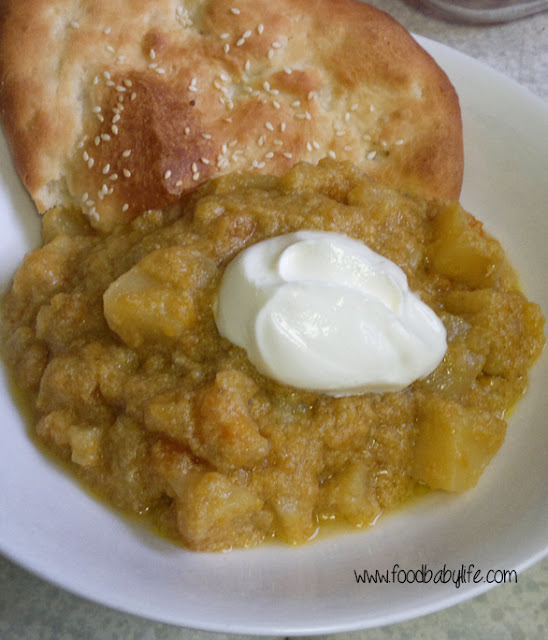
In an effort to start the year off on the right foot, food wise, my first post for the year is a Meatless Monday meal. And even better it is one that is so seriously delicious that even the meat-lovers amongst us will be practically licking their plates clean!
Just don't be like me and take photos before adding one of the major elements of the dish, namely the crunchy fried tofu. Oops. While it definitely needs to be there for protein and crunch, it would have only added another layer of brown so it's no great loss.
Potato Curry with Naan and Crunchy Fried Tofu
Serves 4
For the curry:
500g sweet potato
500g potatoes
2 tbs curry paste
1 large onion, finely sliced
1 tbs coconut oil or ghee
2 cloves garlic
1 tin coconut cream
1 tin's worth of water
Salt, pepper and dextrose/sugar to taste
I cooked mine in the slow cooker but this works just as well on the stovetop. Directions for both are below.
Peel and chop the potatoes and sweet potato into 2 cm dice. Fry the onions in the coconut oil until starting to soften and go golden then add both lots of potato. Add the curry paste and extra garlic and fry for 2-3 minutes until fragrant and the paste is coating the potatoes. Add the coconut cream and water and mix well.
At this point you could pop the whole lot in the slow cooker on low and head out for the day! Or if you are cooking this at dinner, just simmer until the veges are tender and the sauce has reduced. Serve with a dollop of plain yoghurt, tofu and naan.
For the breadmaker naan:
Recipe adapted from here
185ml warm water
2 tbs coconut oil
90g greek yoghurt
1 ts salt
1 ts dextrose/sugar
1 ts onion flakes
1 clove garlic, crushed
100g wholemeal flour
350g bread flour
2 ts dried yeast
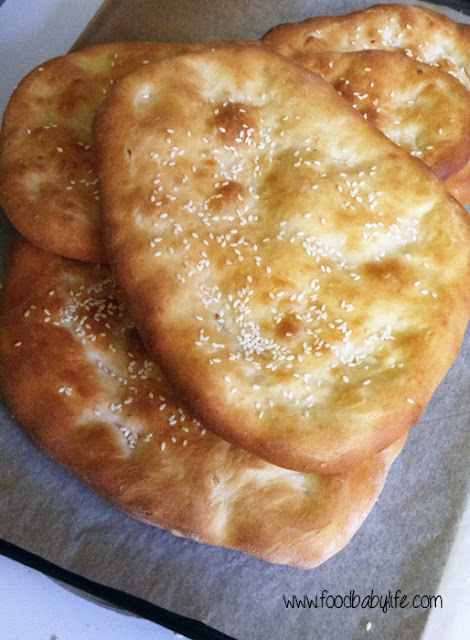
I made the dough in the breadmaker which simply involved adding all the ingredients in the order listed and using the pizza dough setting. After 50 minutes I had gorgeous soft dough ready to cut into 6 even pieces and shape into oblongs around 20cm long. Drizzle the top of each with coconut oil, sprinkle with sesame seeds and bake at 250 degrees celsius for around 10 minutes or until puffed and golden brown.
If you don't have a breadmaker follow the link to the original recipe above.
For the tofu:
250g firm tofu of your choice
Seasonings
I used a pack of sesame tofu nuggets which I chopped roughly then fried in coconut and sesame oils. I added a drizzle of rice malt syrup and some extra sesame seeds. Delish. Fry until nice and crispy and serve on top of your curry.
So that's my seriously delicious potato curry with tofu and naan. Enjoy!
Labels:
Breadmaker,
Breads,
Curry,
Meatless Monday,
Vegetarian
Subscribe to:
Posts (Atom)

